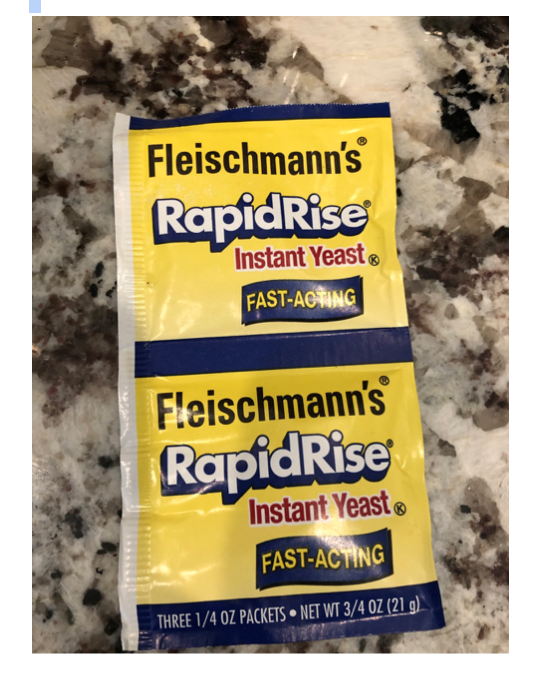
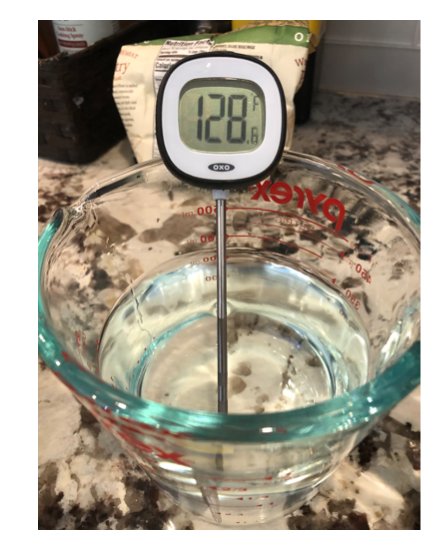
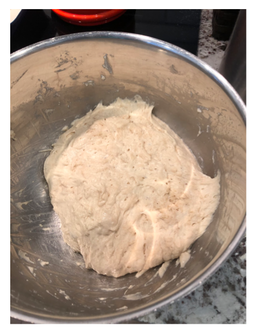
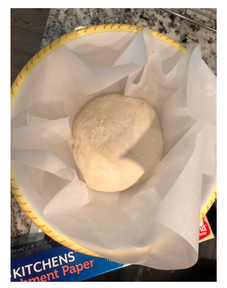
The Science of Bread with WendyFirst - a science experiment with Wendy! Press play!!Storytime! The Little Red Hen with Wendy!A lesson in making bread at home - starring our favorite scientific chef, Wendy!Greetings Paddington friends! One way I have been using my time at home these days is baking fresh bread. There is nothing like having bread still warm from the oven, topped with salted butter. YUM!! It got me thinking a little more about how science is truly all around us in so many things we do around the house. I thought I would talk a little bit about the science of bread-making. I’ve been using a very simple process for bread making. The link to the full recipe is provided below. https://www.jennycancook.com/recipes/faster-no-knead-bread/ Let’s walk through the steps and talk a little bit about some of the science behind the yummy-ness. First, the flour: 3 CUPS OF ALL-PURPOSE FLOUR. I scoop it from the large container into my measuring cup, then I brush off the top bit to make sure the flour is level to the top of the measuring cup. Baking is a very precise science, and it is important to add the correct amounts of ingredients! I add the three cups to a large mixing bowl. 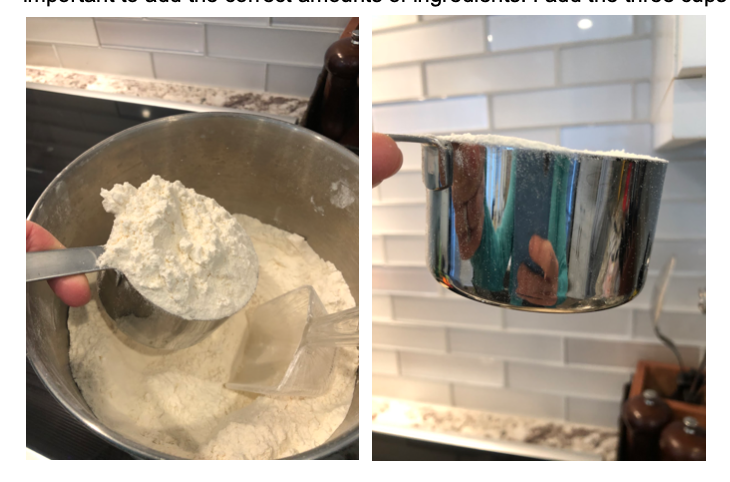
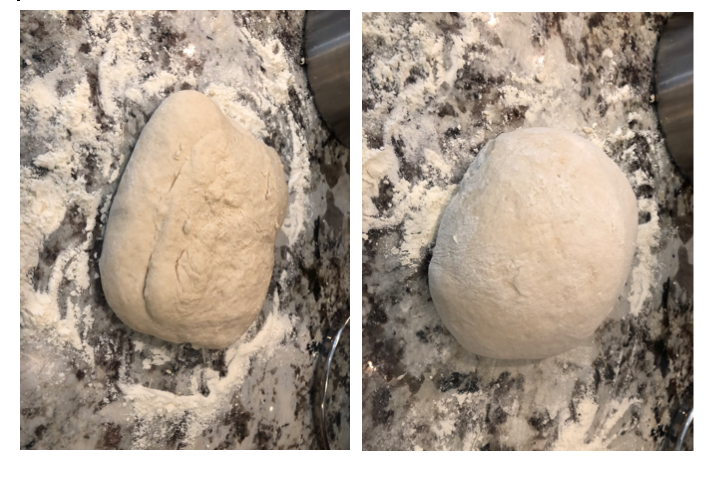
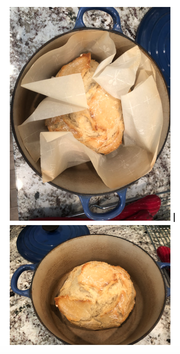
Let cool for at least 20 minutes and enjoy! When you slice into it, you should be able to see lots of tiny holes. Those yeast were busy!! The structure of the holes is maintained by the gluten in the flour. Gluten free breads required other ingredients to help the bread maintain the structure and show the tiny holes. 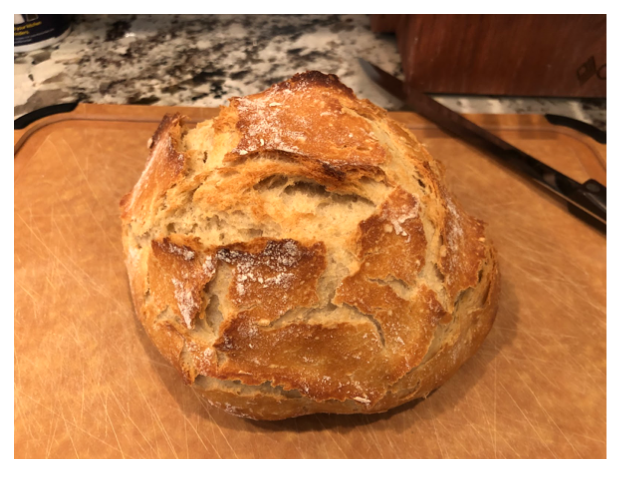 Kelly is here to read "The Magic Hat" by Men Fox! Grab your own magic hat and enjoy a story with Kelly!An update on our butterflies - they have EMERGED!!!
2 Comments
Kelly is here today to read you the story, "You can do it, Bert!"Story time Activities you can do at home! “You Can Do It, Bert” by Ole Konnecke Challenge yourself to try something new! 1. Bert was trying something new, something he hadn’t done before. Is there something you could try today that you haven’t done before? Maybe try 30 jumping jacks in a row, or you could draw a bird like Bert, or maybe you could get dressed all by yourself :). Challenge yourself to try something new! Find birds in your neighborhood! 2. After I read the story I went outside to see if I could see any birds in the trees. I saw a robin, and a really big blackbird. If you go outside or look out of your windows do you see any birds? What kind of birds live in your neighborhood? Sing a song about birds! 3. Do you remember our Bird Song? Way up in the sky The little birds fly (flap your wings) Way down in the nest The little birds rest (pretend to sleep) With a wing on the left (flap your left wing) And a wing on the right (flap your right wing) The little birds sleep All through the night (SHHHHH) The bright sun comes up (make a sun over your head with your arms) The dew falls away “Good Morning Good Morning” (make your hands talk like a beak) The little birds say Kelly has another magical story for you to listen to - "The Most Wonderful Egg in the World!"Story Time Activities related to “The Most Wonderful Egg In The World” by Helme Heine 1. In the story Dotty, Stalky, and Plumy each laid an egg, and each egg was extraordinary and unique. Pretend that you are a chicken, Bok Bok, and lay an egg. What does your egg look like? Is it a colorful egg? Is it a small, medium, or large egg? You could even draw or paint your extraordinary egg! 2. In the story Plumy’s egg was not the usual egg shape - it was a cube. Go on a shape hunt around your house or yard and look for things that are in the shape of a cube. Does a cube resemble a square? How many squares can you see on a cube? 3. Presumably chickens came out of Dotty, Stalky, and Plumy’s eggs, but maybe not? what if the story continued and we got to see what hatched from the eggs? What do you think came out of Dotty’s perfect egg? What came out of Stalky’s very large egg? And finally what hatched from Plumy’s colorful cube shaped egg? I wish that I could hear all of your creative answers - you have the best imagination! On and Off with Wendy!Science Teacher Wendy is here to do a special activity based on a lesson she did at school a new weeks ago - "On and Off!" How many *safe* things can you find that turn on and off? Make sure a grownup is supervising this fun science activity!
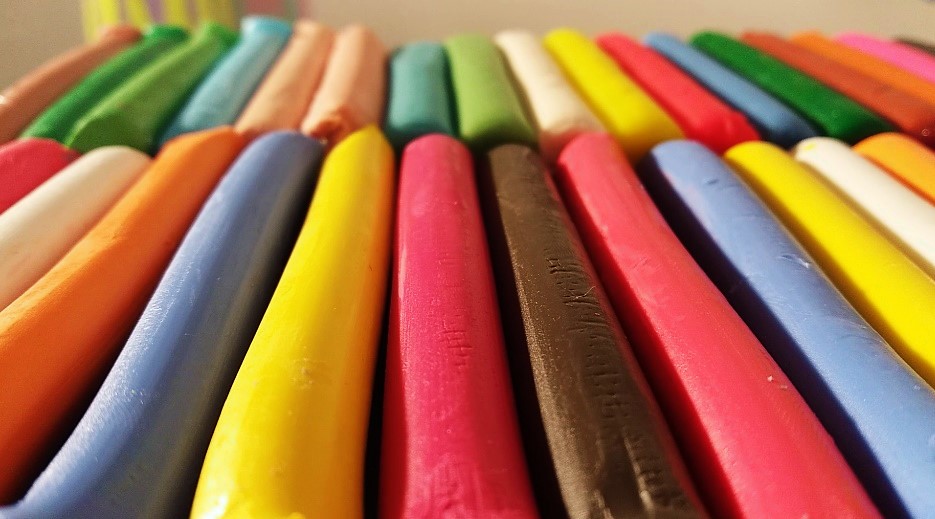
Nea is here to read you the story, "Strictly No Elephants"Grab a snack and get cozy - Kelly and Pink Pig will be reading you a special book entitled, "Help!"Kelly would like to share an activity you can do at home related to the book, "Help" by Holly Keller!* After listening to the book “HELP” have a grown up cut out a triangle and two circles from scrap paper. See if you can make these shapes look like a mouse. You can even add eyes and a tail! * Make a batch of homemade play dough (recipe to follow) and roll it into little balls, after rolling little play dough balls place them on a table and roll them into little snakes. Your paper mouse and play dough snake can have a playdate! Play Dough Recipe Ingredients: 1 cup salt 3 cups water 3 cups flour 6 Tablespoons vegetable oil 4 Tablespoons cream of tartar coloring Recipe 1. Add 1 cup salt to large mixing bowl. 2. Boil 3 cups water then add to salt. 3. Stir for a few minutes until salt begins to dissolve. 4. Add coloring and stir. 5. Add oil. 6. Add cream of tartar and stir. 7. Add flour one cup at a time and stir. 8. Once it forms a dough - flour your work surface and knead until cool. * Play Dough can be finicky add flour if too sticky :) Caterpillar Update - Week 2 of growth!Hello to all! Our caterpillars have been very busy since we last checked on them. Check out the photos below and my comments to follow their progress. Day 7: The caterpillars have grown much bigger! You can really see the spikes/hairs that cover their bodies. There is one caterpillar that is walking on the lid of the cup. Wouldn’t it be fun to walk on the ceiling?? 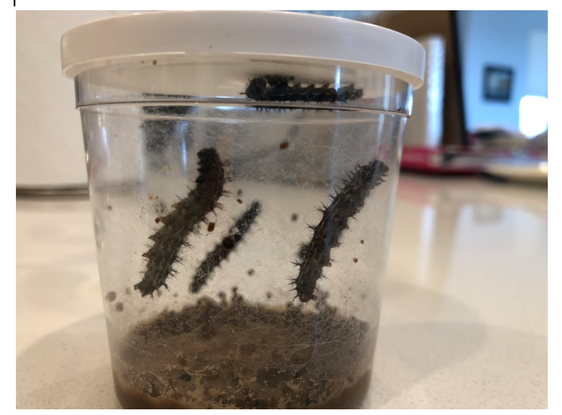 Day 8: Here is another view of the caterpillars. You can see what looks a little like spider webbing inside of the cup. The caterpillars make this silk webbing to protect themselves, as well as to stick to things. 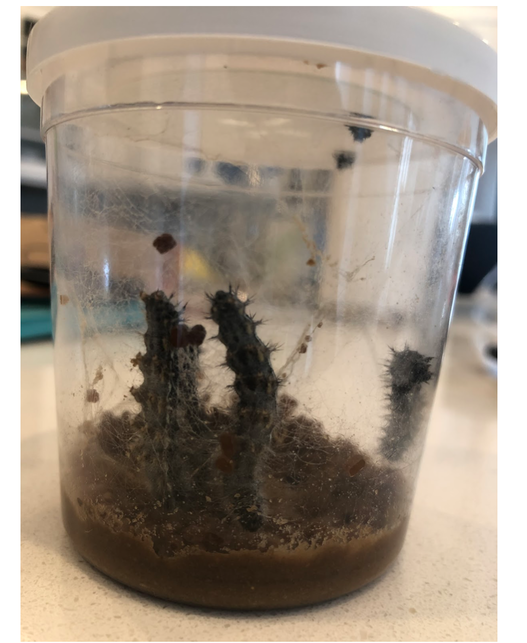 Day 9: The webbing makes it hard to see the caterpillars! 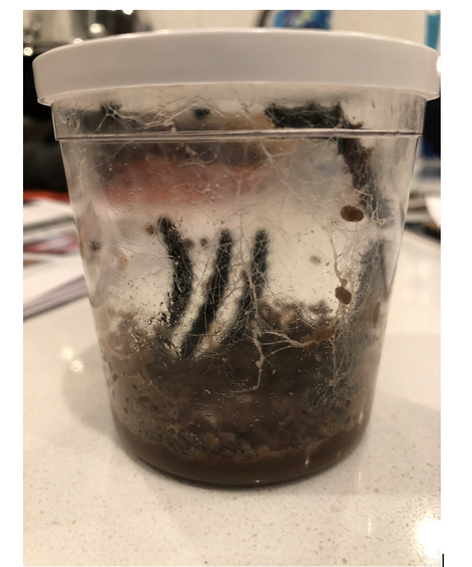 Day 10: All the caterpillars are on the lid of the cup now. I think they may be ready to move into the next stage of their life cycle - the pupa stage where they will build their chrysalides! 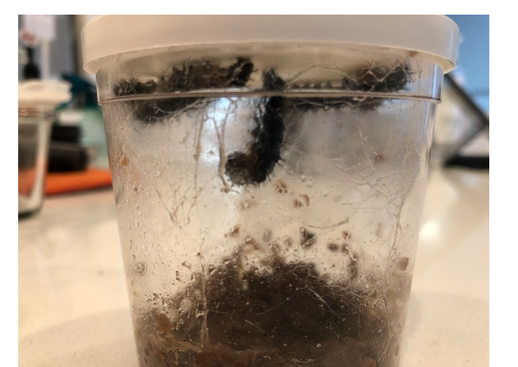 Day 11: Chrysalides are forming!! In this photo all caterpillars are hanging upside down. The one in the middle has already formed a chrysalis! You can still see the hairs of the other caterpillars, and the one in the middle looks smooth and has some spots down it’s length. 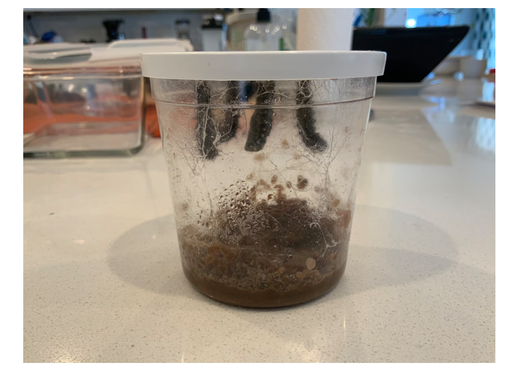 Day 13: All caterpillars are in the pupa stage. Each one has built a chrysalis! 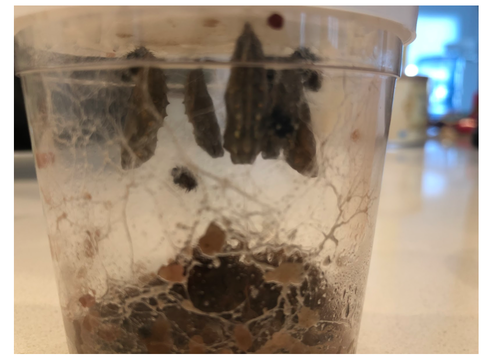 Day 15: Here is a photo that shows each caterpillar chrysalis. The chrysalis is made of a tough “skin” that is underneath the hairy outer part of the caterpillar. You can see sections in the top part, and they remind me a little of the caterpillar body sections. The bottom part is smoother...this is where the wings are forming! They are attached to the lid with the silk webbing that we saw in the cup above. You can also see a small piece of the hairy outer part of the caterpillar near where each chrysalis is attached. This is the part that was shed from the caterpillar as it made it’s chrysalis. Once I captured a cool video of this happening, and I will try to upload it to this page as well. 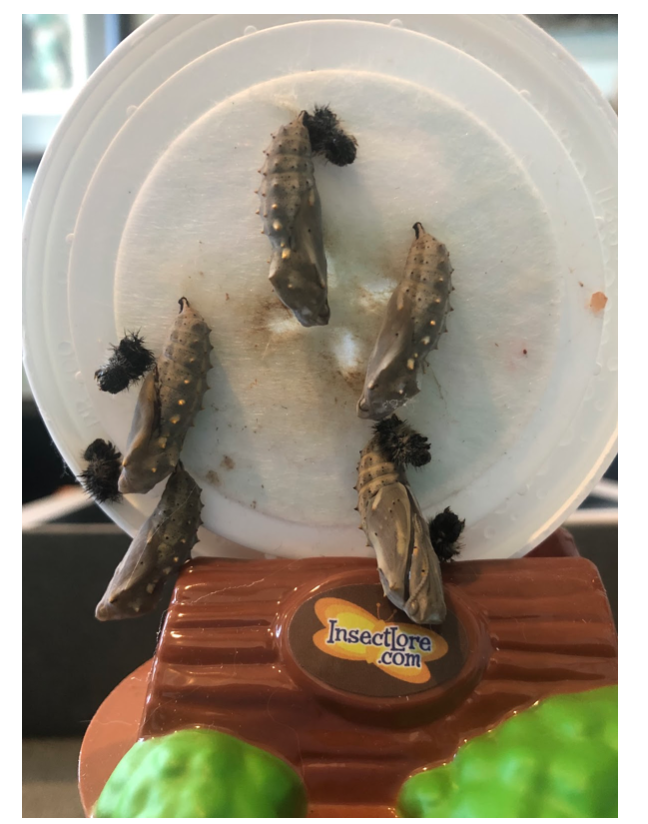 Now we just have to wait for the butterflies to emerge!! I’ll keep taking pictures and will show you when they come out!! Activities to do related to caterpillars and butterflies: 1.Make a 3/D caterpillar Craft supply ideas: Pom poms, balls of wadded up tissue paper, circles cut out from colored paper, egg cartons. Etc. Check out this website for Eric Carle inspired caterpillar crafts: https://www.thesprucecrafts.com/very-hungry-caterpillar-crafts-for-kids-4125556 2. Make a chrysalis: toilet paper roll, old sock, paper, etc. 3. Draw a picture of what you think the butterfly will look like when it comes out of the chrysalis. Have fun! Wendy
Ladies and gentleman you are in for a TREAT - this special book was Deb's favorite childhood story! We hope you enjoy hearing "Caroline's Party"!It's caterpillar time! A Letter from Science Teacher WendyHello Paddington friends! Every spring we do a science unit on the life cycle of a butterfly using live caterpillars (ordered directly from InsectLore.com, or through Amazon). Most of us have read “The Very Hungry Caterpillar” by Eric Carle. There are many other wonderful books about butterflies including the following: “A Butterfly is Patient”, by Dianna Astone and Sylvia Long “Butterfly, Butterfly”, by Petr Horacek The scientific term for the changing of a caterpillar into a butterfly is metamorphosis. This insect has two completely different body forms! Another insect that is similar to a butterfly is a moth. Moth caterpillars follow the same life cycle, however instead of forming a chrysalis, they form a “cocoon”. These terms are often mixed up. Butterflies: Chrysalis, Moths: Cocoons. 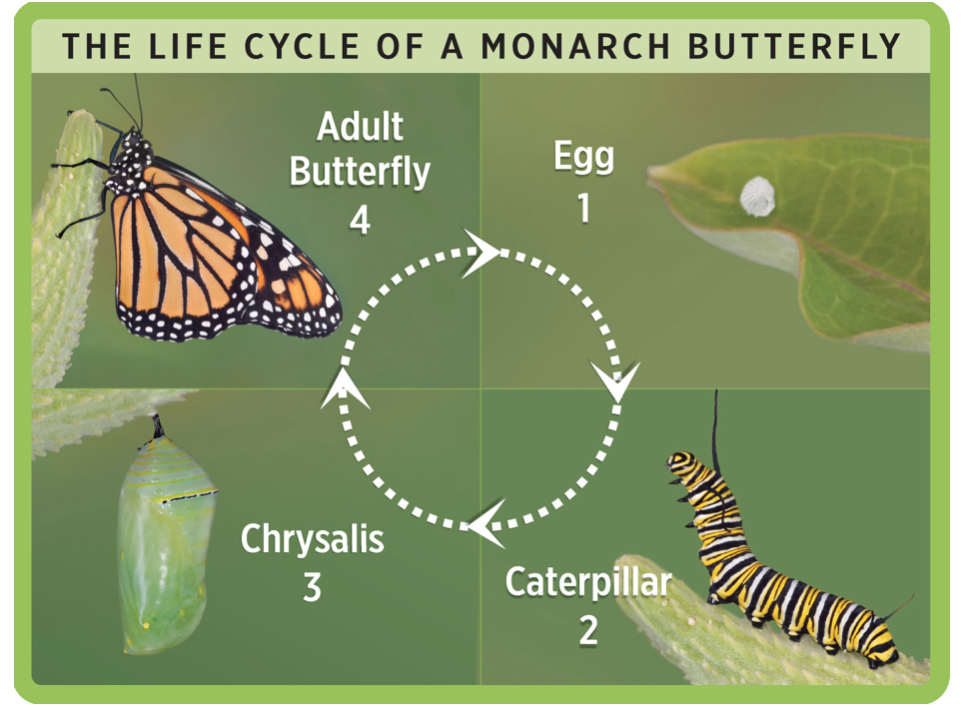 Our baby caterpillars arrived in a cup that contained all food the caterpillars will need. They will grow inside the cup over a 2 week period, then will crawl to the top and form their chrysalides. At that point, we will move the chrysalides to the butterfly tent and wait for our butterflies to emerge. Check out the National Geographic kids website for more great information and photos of the process of butterfly metamorphosis! Below are some photos of the progress of our caterpillars over the first week: Day 1: The caterpillars are about the size of a grain of rice. There are five caterpillars in the cup. 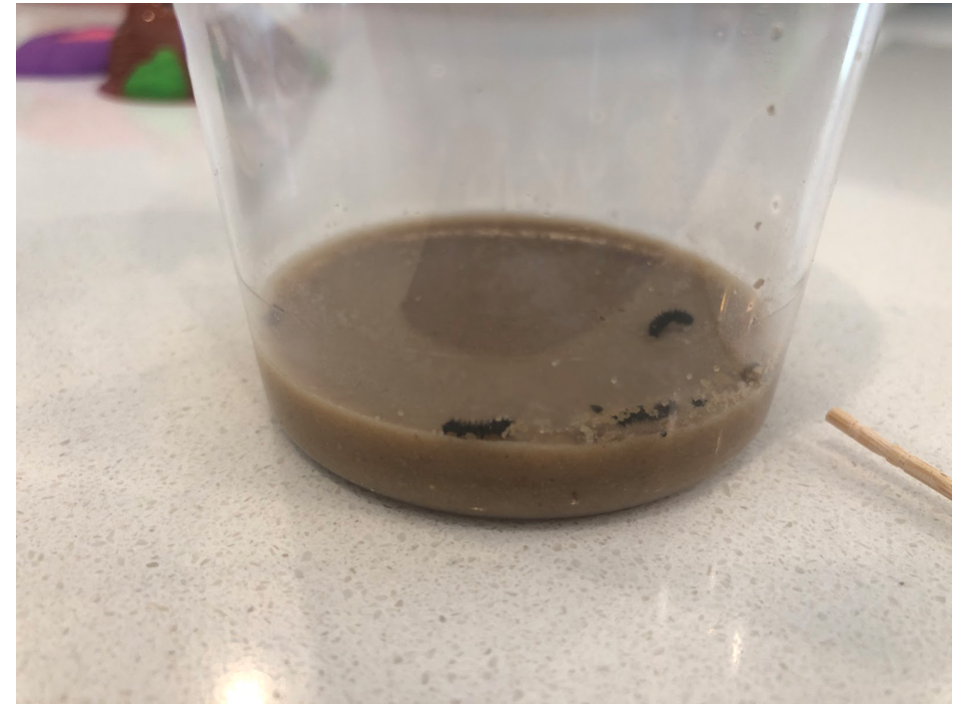 Day 2: The caterpillars are very active, and they crawl around the cup a lot! They have grown just a little. 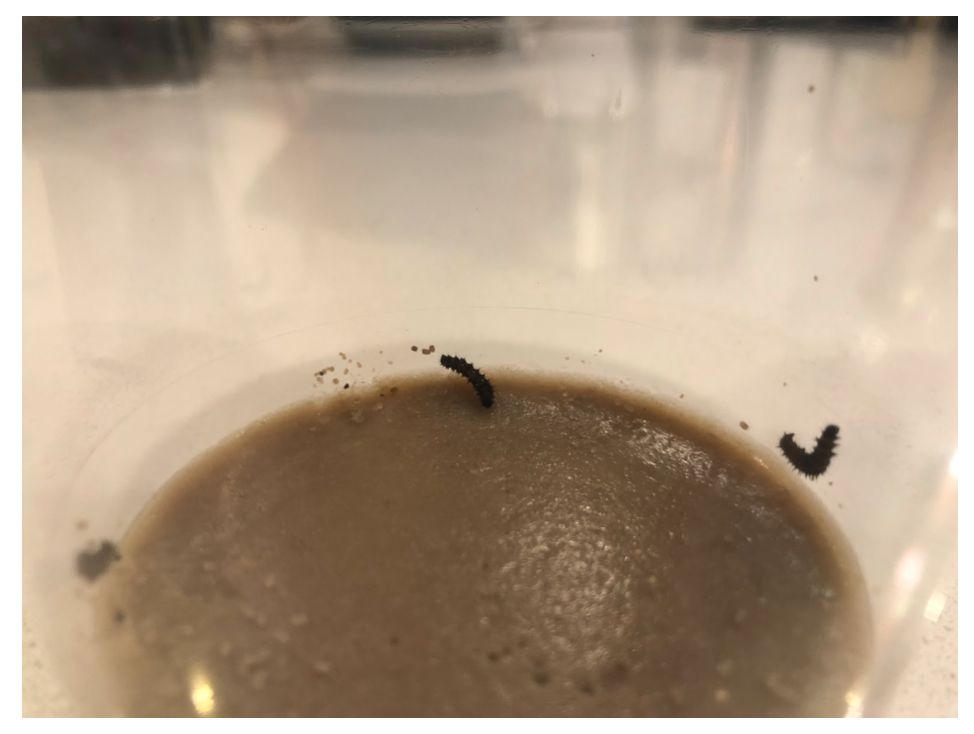 Day 3:The caterpillars have almost doubled in size! You can see that they have lots of spikes, or hairs all over their bodies. 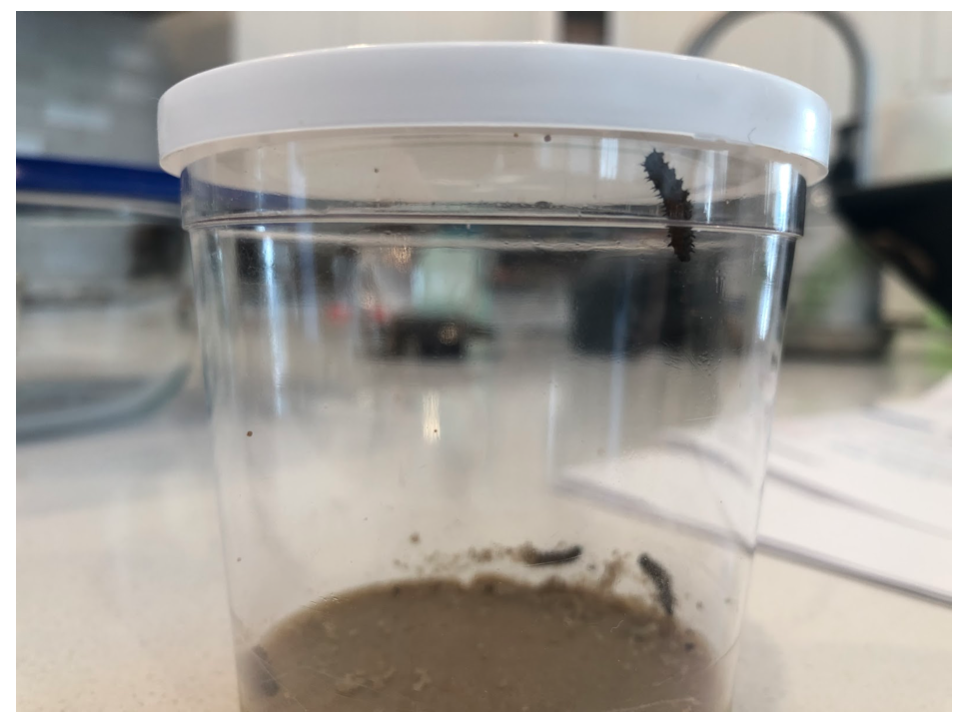 Day 4: As they eat the food, the brown stuff changes a little. This could be waste products (or poop, for a better term🙂). You can also see what looks like tiny pieces of the caterpillar’s body. Like many other insects, caterpillars molt as they grow. THis means they shed their outer layers so their bodies can grow. 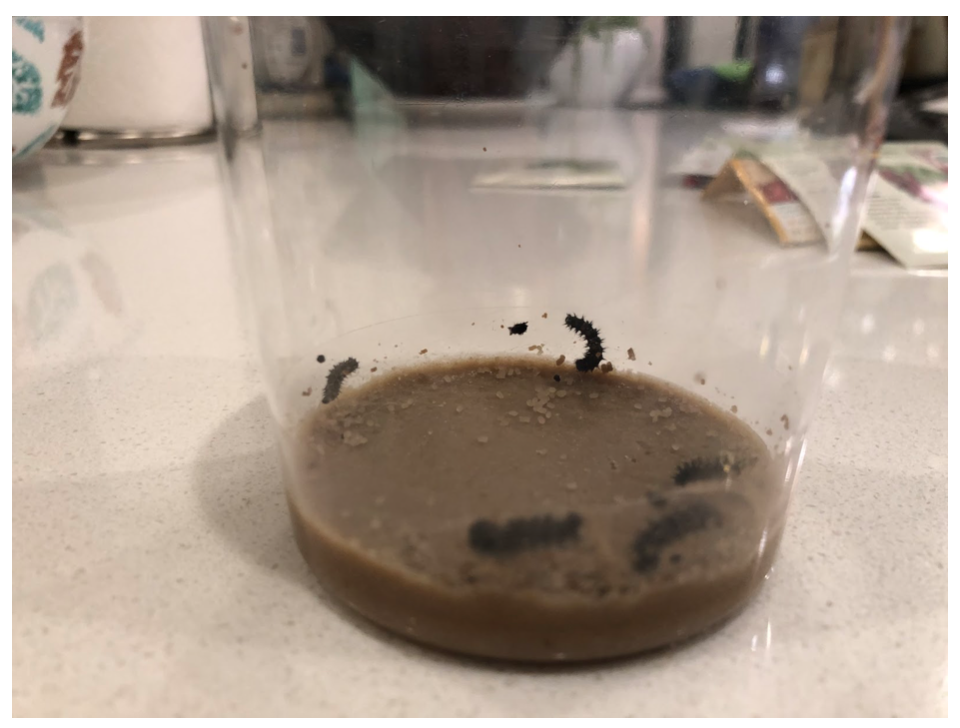 Day 6: The caterpillars are getting even bigger! They like to crawl all over the cup. 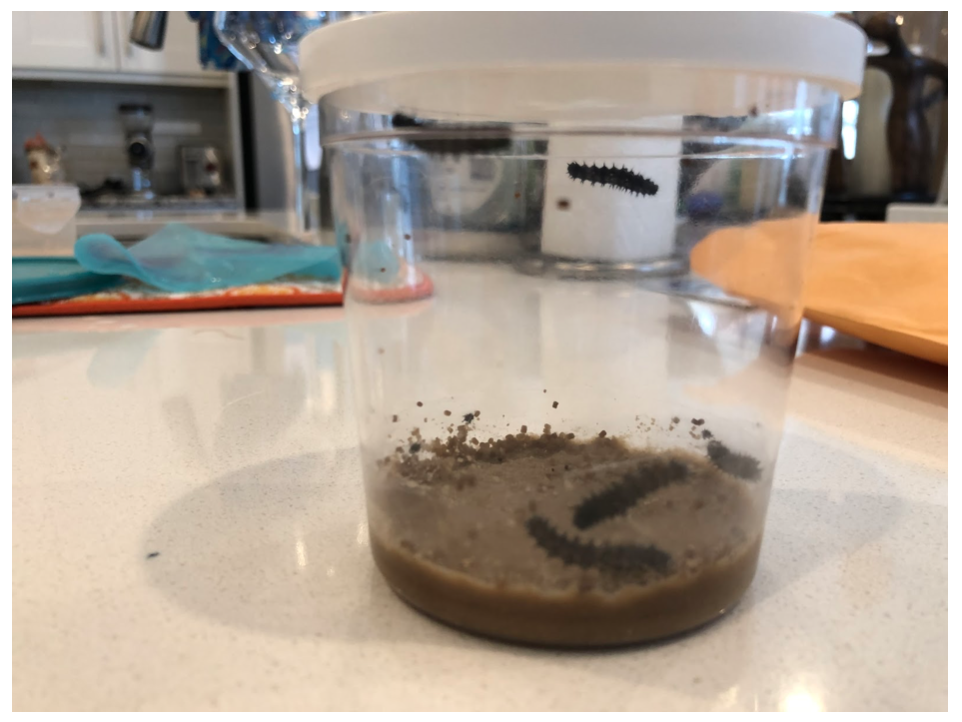 I will continue to take photos of their changes each day. Stay tuned for another posting! I miss you all, and I am excited to join some of your classroom Zoom meetings in the near future! Wendy Planting Zucchini Seeds with Wendy!Send us some pictures of your growing seeds!
|
AuthorBlog posts are samples of our classroom blogs which are available through password protection to all current families. Archives
January 2022
Categories |


 RSS Feed